


As of March 1, 2009, This Food Thing will be hosted at a new address — please make note:
http://thisfoodthing.com
Filed under: Uncategorized | Leave a comment »
As of March 1, 2009, This Food Thing will be hosted at a new address — please make note:
Filed under: Uncategorized | Leave a comment »
Quick to make, Oven Roasted Potatoes are simple to make. The usual recipe – garlic & Rosemary is nice, but gets a bit old. This is one I’ve been using for quite a long time, and is full of interesting flavors, as well as texture and color. Not only tastes great, but plates nicely.

Cilantro (aka Coriander)
1 1/2 pounds small new red potatoes (about 15), washed well
1/4 cup vegetable oil (or olive oil, if you have it)
4 to 6 cloves garlic, crushed
2 tablespoons fresh cilantro
2 teaspoons fresh thyme, or 1/2 teaspoon dried thyme
1/4 cup diced red bell peppers
1/4 cup diced green bell peppers
Salt and Pepper, to taste
Preheat the oven to 375 degrees F.
Wash well, and then dice the potatoes into bite sized pieces – about 1 inch. I hardly ever peel the potatoes. I like to leave it intact, as it gives good flavor, and texture.
In a large bowl mix the oil, garlic, and cilantro and thyme. Add the potatoes and peppers and toss well.
Transfer the potatoes to a shallow baking pan, and arrange into a single layer. Roast until potatoes are tender when tested with the tip of a knife, which should be between 25-30 minutes.
Serve hot, or cold, as these are great leftover.
Note:
I have sometimes made a ‘potato’ salad with the leftovers, adding in mayo, and eggs, with a bit of spicy mustard.
Filed under: Grains, Potatoes, Pasta | Tagged: cilantro, cooking, food, garlic, oven roasted, potato, potatoes, recipe, roasted potato | 2 Comments »

Another guest post by Sander.
(btw, Sander’s opinion on ketchup is not mine!!!)
Wieners – or hot dogs, as they are known in the United States – are nice-tasting fully cooked sausages. You can do about ten thousand foods with them – use as a meat in salads, boil, fry with eggs, make sandwiches… sky is the limit!
But since childhood, my favorite way of making wieners is wiener piglets – incredibly easy to make, great-tasting and great-looking food. I think half of my relatives come to the parties held at my parents just to get cheese’n’mayo sandwiches and wiener piglets…
Wiener piglets are especially popular with kids – they look good (click on the picture to see larger version), have a funny name and taste great. And – kids can actually help to make them.
But how?
You take the sausage, cut a small cross in the end – about an inch deep – and put to hot oven (around 200..250 degrees Celsius). Depending on the type of sausages, they will take 10 to 20 minutes until ready – when the puffy ends start to get brown, they are done.
And that is it, all ready to eat. You can have them separately or as a side dish for salad/rice/potatoes. If you have crappy sausages or dead taste buds, you can use ketchup or mayo on them.
Filed under: Estonian, Snacky Things | Tagged: hot dog, piglet, sausage, Side Dish, simple, simple recipe, wiener | 1 Comment »
I have several posts here on TFT that I know a lot find by searching. I thought I would post a few links here, so everyone knows where to find what they are looking for.
Filed under: Misc | Tagged: convert recipe, double recipe, half recipe, ingredient conversion, measurement, measurement conversion, ph value, recipe converter, scale recipe | Leave a comment »
Todays post is by a guest poster — Enjoy!
This is an exerpt from Esquire Magazine. I made this myself for Christmas, wow. Add some garlic and lemon pepper to this to make it zesty. Cook some chicken on the side with more garlic and you’ve got yourself a wonderful meal. Some might view the additions as sacriligious, but it’s still good, and, to me, it’s the taste that matters. You have to walk a fine balance between being creative and being authentic, a question I plan to discuss in a future post, but it is a line you can indeed walk, if you know what you’re doing. Anyway, serve this along with a salad and crusty Italian bread. I personally dislike wine, but follow the instructions at the end, I’m sure they work. I drink a fine espreso after this, myself.
Fettuccine all’Alfredo is one of those dishes everyone I’ve ever met swoons
over. They imagine it to be the richest, most extravagant amalgam of
ingredients ever to send a palate reeling, but it’s also comforting, sensual,
and entirely satisfying, strand after creamy strand. Indeed, the dish was
created to restore the appetite of a woman, and I cannot imagine any woman not
being impressed by a man who knows how to tum out this classic pasta with
finesse.
This is a cute story: Back in the 1920s Alfredo Di Lelio ran a little
restaurant on Rome’s Via della Scrofa, not far from the Piazzo Navona. His
wife had just given birth to their first son, an experience that left her
exhausted, without an appetite, and therefore without milk for the baby, which
meant Alfredo had to stay up half night rocking a squalling infant. “It was
really a hell of a life,” he wrote. “So one day I decided to take the bull by
the horns and solve the problem once and for all.” He whipped up a dish of egg
noodles, extra-rich butter, and the best parmigiano cheese he could find.
Naturally, his wife gobbled up the noodles with gusto, and soon Alfredo began
serving the dish in his restaurant.
The dish became legendary when Douglas Fairbanks and Mary Pickford visited
Rome in 1927 and ate at Alfredo’s place, proclaiming him the “king of
fettuccine” and presenting him with a golden fork and spoon as a memento. From
that moment the dish became part of a tradition among celebrities, who had to
eat at Alfredo’s when in Rome-and to get their photos in one of the two
competing Roman restaurants that now call themselves Alfredo’s.
What happened was that during the war Alfredo retired, handing over the
restaurant to two of his waiters, but afterward decided to open a new place
called Alfredo l’Originale. Over the years both places have claimed to be the
“original” Alfredo’s, but the Di Lelio family is still in charge of the newer
restaurant and has opened three outposts here called Alfredo, the Original of
Rome-one in New York, another in Philadelphia, and a third at the Italian
Pavilion in Walt Disney World’s EPCOT Center-all serving the ilustrious dish
better than anywhere else I’ve ever had it. There’s no secret to making the
original fettuccine all’Alfredo, but most people botch it anyway. Alfredo’s
own printed recipe is deliberately vague: “water-salt-extra fine flour of the
highest quality, mixed by hand with fresh eggs-a most carefully selected
butter and finally Parmesan cheese, but not dried and aged Parmesan (I just
take the core of fresh cakes and grate it by hand).” That’s it? No
proportions? No pots or pans?
Well, I’ve come up with an estimable home preparation that’s as close to the
mark as I think you’ll come. The key is in the ingredients and in the cooking
time. If you have no intention of going out to buy these kind of ingredients,
don’t bother with the dish at all. You may come up with a nice-looking plate
of noodles, but it’s like wearing a blue-flannel blazer with a polyester tie:
it’s a cheat and someone will notice.
NO STRINGS ATTACHED
If you have a pasta machine at home, by all means make the fettuccine fresh,
using nothing but flour and eggs (no water, no oil in the dough), but be aware
that Alfredo’s uses three different types of flour-semolina, durum, and a
high-gluten variety-for their noodles. Or buy a fettuccine freshly made at an
Italian pasta shop-and I don’t mean the “fresh” fettuccine put up in plastic
boxes and stored in the refrigerator section of the supermarket. Otherwise,
use a good imported brand such as De Cecco.
Put on a large pot of water (at least sixteen cups) to boil. While you’re
waiting for it to boil, melt one stick of sweet butter (not margarine) in a
saucepan and allow it to melt but not to sizzle. Add about four tablespoons of
heavy cream (not light cream, not half-and-half, not milk), and stir it in.
(You’ll notice that the original recipe does not contain cream, but I’ve seen
it added at the New York Alfredo’s; Americans seem to expect the dish to be a
little creamier.) Remove the mixture from the heat.
When the water is boiling furiously, throw in two tablespoons of salt. Then
plunge the fettuccine in the water. If it is fresh pasta, wait till the water
retums to the boil, then count to twenty: the pasta should be perfectly
cooked-al dente. If you’re using packaged fettuccine, figure on about eight
minutes in a rolling boil.
Drain the noodles well in a colander (do not rinse under cold water, which is
just plain stupid), then toss them into the melted butter and cream over low
heat. Grate into the mixture about one and a half cups of parmigano reggiano-
this is the true imported Parmesan cheese, and nothing else comes close. But
grate the cheese from the sweet, golden core, not from the harder, drier,
white part near the rind.
Toss together for about thirty seconds so that the cheese melts and the whole
thing comes together. Serve on a slightly heated plate. The consistency should
be satiny, and rich but not heavy, with the slight tang of cheese and the
lusciousness of butter, all buoyed by the slightly chewy texture of egg
noodles. Once you learn how to do this correctly, it’s like knowing the
“thirteen times” tables. Nothing to it really, but something so few ever
bother to master.
With fettuccine all’Alfredo, you should drink a good Italian red, like
Lungarotti’s Torgiano or Antinori’s Tignanello.
-John F. Mariani
From “Esquire” – March 1986
Filed under: Grains, Potatoes, Pasta | Tagged: butter, cream, fettuccine, fettuccine alfredo, food, pasta, recipe | 1 Comment »

Long Island Iced Tea
Long Island Ice Tea – created in the 1970’s on Long Island, New York doesn’t actually contain tea, but is supposed to taste similar. It’s a hugely popular drink, served almost everywhere. I’m sharing this recipe as Sander is going to be making these at his New Years Party this year, and needed to know exactly what was needed. I’ve included a recipe for Sweet & Sour Mix, with some variations as well.
1 part vodka
1 part Tequila
1 part rum
1 part gin
1 part triple sec (or an orange flavored liquor)
1 1/2 parts sweet and sour mix (see recipe below)
1 splash Coke or Pepsi
Mix ingredients together over ice in a glass. Pour into a shaker and give one brisk shake. Pour back into the glass and make sure there is a touch of fizz at the top. Garnish with lemon.
Variation 1
3 cups granulated sugar
3 cups water
2 cups lemon juice
2 cups lime juice
(or 4 cups lemon, or 4 cups lime)
Combine the water and sugar into a large sauce pan. Stir over medium heat until the sugar dissolves. Bring to a boil, and then boil for 5 minutes. Cool. Add in the lemon & lime juices. Stir to mix and then refrigerate. This can be kept for about a week in the refrigerator.
Variation 2
1 Cup lemon juice
1 Cup lime Juice
1 cup confectioners sugar (aka caster sugar or icing sugar – 10x sugar)
Mix together well, and allow to sit for 4-24 hours. Stir occasionally, making sure the sugar is dissolved.
Variation 3
2 cups lemon or 2 cups lime juice
1 cup 1 cup confectioners sugar (aka caster sugar or icing sugar – 10x sugar)
Mix together well, and allow to sit for 4-24 hours. Stir occasionally, making sure the sugar is dissolved.
Filed under: Alcohol | Tagged: Alcohol, Drinks, long island iced tea, New Years, sour mix, sweet & sour mix | Leave a comment »
Many cocktails call for a sweet and sour mix, or as it may be known’ sour’ or ‘sour mix’. I’ve put a few variations of the mix recipe here — two are “no heat” versions, and one needs a 5 minute boil. All the recipes are simple to do.

Variation 1
3 cups granulated sugar
3 cups water
2 cups lemon juice
2 cups lime juice
(or 4 cups lemon, or 4 cups lime)
Combine the water and sugar into a large sauce pan. Stir over medium heat until the sugar dissolves. Bring to a boil, and then boil for 5 minutes. Cool. Add in the lemon & lime juices. Stir to mix and then refrigerate. This can be kept for about a week in the refrigerator.
Variation 2
1 Cup lemon juice
1 Cup lime Juice
1 cup confectioners sugar (aka caster sugar or icing sugar – 10x sugar)
Mix together well, and allow to sit for 4-24 hours. Stir occasionally, making sure the sugar is dissolved.
Variation 3
2 cups lemon or 2 cups lime juice
1 cup confectioners sugar (aka caster sugar or icing sugar – 10x sugar)
Mix together well, and allow to sit for 4-24 hours. Stir occasionally, making sure the sugar is dissolved.
Filed under: Alcohol | Tagged: Alcohol, Drinks, New Years, sour mix, sweet & sour mix, sweet and sour, sweet and sour mix | Leave a comment »

Have a CarbyDay!! Flying Spaghetti Monster | http://www.venganza.org
Filed under: Misc | Leave a comment »
There are some things that I make that are almost painfully simple. And after reading some of the blogs this past week with all the complicated recipes — from liver pate to potato confiet, I really am almost embarrased to post this recipe. But.. I’m a simple cook, for the most part, and sometimes the simple things are just fantastically yummy. This is one of those recipes.
We (and by “We”, I mean my son and I), are trying to create some new traditions, and make new memories. It’s been hard after the divorce to not be saddened by what /was/, and instead, be happy with with /is/. And so I decided to do some new things this year, one of which is to make some different foods. This recipe, though I have made it in the past on occasion, is not something I would normally make. First, I don’t often use refrigerator rolls, and second, it’s rather too much for the two of us. But it is Christmas, and I did want new/different foods.
This version of Monkey Bread, aka Pully Bread, Pull Apart Bread, Picky Bread, Pinch Me Cake – whatever you may know it by, (and in the end, whatever it is you choose to call it), is ridiculously silly easy. With the plethora of names this recipe is known by, there are 1000x that many versions of this recipe. I bring nothing new to the recipe whatsoever. It just happens to be what I decided to make, and to share here. Listed below the recipe are a few other versions.
With supervision (the caramel/syrup is just too hot for little ones), this version of the recipe can be made by kids, and takes only about 10 minutes..maybe 15 minutes from start of prep to entry into the oven.

3 12-ounce tubes refrigerator biscuits, or rolls (like the Pillsbury type) (or a double recipe of your favorite yeast bread)
1 cup sugar
3 tablespoons cinnamon
1/2 cup butter
1 1/2 cup brown sugar
1/2 cup chopped pecans (up to 1 cup, if you like, and I do!!)
1 tablespoon cinnamon
1/2 cup raisins, dried currants, or dried cranberries (or similar)
Open the tubes and remove the ready-to-bake rolls or biscuits. The object is to cut each piece into 4 pieces. I try and remove the rolls from the package all in one full roll, slice longways in half twice, making 4 long pieces, and then pull them apart into the quarter section.
The traditional pan to use is a “bundt pan”. I don’t happen to have one, so I used a disposable aluminum pan – a double long bread pan

Extra long, wide disposable pan
size. (as shown here). Spray well with ‘Pam’, or oil well with vegetable oil and set aside. You don’t want to use a regular bread pan size as it is too small for this recipe – it needs to be double long.
In a ziplock bag, pour in the 1 cup of sugar, and the 3 tablespoons cinnamon. Zip it closed and shake it to mix. Put 1/2 of the cut up biscuits/rolls into the bag, zip to close, and shake until all the pieces are well covered. Put these pieces into the pan. Get the remaining pieces ready to go, by putting them into the ziplock bag. Shake them, and leave them in the bag for now.
Meanwhile, put the butter and brown sugar into a saucepan. Stir often, and then, once the butter and sugar start to melt, stir until the sugar is dissolved. Boil for about 1 minute.
Once this has boiled, pour 1/2 over the pieces in the pan. Sprinkle with 1/4 cup of the pecans, and half of the remaining cinnamon. Cover this with the remaining pieces from the ziplock bag, and pour the remaining half of the butter/brownsugar syrup overtop. Cover with the rest of the nuts and cinnamon.
Bake at 350F for 40-45 minutes. Once this is done, remove from the oven and allow to set at least 10 minutes. Turn out onto a serving dish or platter. This will be VERY hot, so be careful.
Filed under: Breads, Christmas, Desserts, holiday | Tagged: breakfast, breakfast breads, dessert, Monkey Bread, pecans, quick bread, recipes, simple recipe | Leave a comment »

Here We Come A Wassailing
5 apples
1 1/2 cups brown sugar
1 cup port
4 12-ounce bottles of ale or dark beer, plus 1/4 cup
4 cinnamon sticks
4 cloves
1 Lemon, zest only
1/2 teaspoon ground cinnamon
1/4 teaspoon ground all spice
1/4 teaspoon ground cardamon
1/2 teaspoon ground ginger
Slice apples in half, and core. Place the apples in a baking dish, and cover with one cup of brown sugar, 1/4 cup of ale, and the port. Cover and bake for 30 minutes at 350F.
In a large pot, pour in the beer – 48 ounces (1.5 Liters). Add in the cinnamon sticks, cloves, lemon zest, ground cinnamon, ground allspice, ground cardamon, and the ground ginger. Bring to a simmer and then turn the heat to low.
One the apples have finished, pour the entire contents (including the juices) into the pot with the ale and spices. Allow to simmer over low heat for 30-35 minutes.
Serve hot, garnished with a slice of fresh apple, and a cinnamon stick.
1/2 gallon (about 2 liters) apple cider/juice
1/2 gallon (about 2 liters) cranberry juice
1 quart (about 1 liter) orange juice
1/4 cup brown sugar
1-2 teaspoon ground cloves
4 cinnamon sticks
4 whole allspice
Add all the ingredients to a large pot, or a crockpot/all day cooker. Stir well.
Over medium heat, continue to stir, to mix the spices in. Reduce the heat to low, and simmer for 20-25 minutes. Keep this on low to keep warm, stirring occasionally.
Serve hot, with a cinnamon stick as garnish.
Filed under: Alcohol, holiday | Tagged: Alcohol, ale, beer, Christmas, Christmas Drinks, Drinks, food, non alcholic, wassail, wassale | Leave a comment »
Weekends in my house are always for cooking. And I enjoy making food on Saturday, but Sunday meals are always so much fun to make as I get to cook with Sander. We decide at the end of the week what we will cook together, and come Sunday, have a fun time cooking – each in our own way, making the same dish, with different techniques.
This week he chose chicken breasts and rice. And though I love chicken and rice, I was drawing a blank on what I wanted to do. So this recipe is, for the most part, his recipe. His choice was chicken, rice, an onion, and an orange bell pepper.
He used quick cooking white rice, while I used a rice blend by Rice Select, called the “Royal Blend”, which is a blend of Texmati white rice, brown rice, wild rice, and red rice. It is also a quick cooking (15 minute) rice, but this recipe could very easily be done with long cooking brown, black, or red rices with the addition of a bit more stock, and a few more minutes cooking time. I really enjoyed the nutty flavor this mix of rice gave to the dish, and cannot wait to make it again. I plan to do some experimenting with the rice mix as soon as possible.

Orange Bell Peppers
2 pounds chicken cutlets, cleaned and cut into bite sized pieces *See note
1/2 small onion, diced
1 medium bell pepper (red, orange or yellow)
2 cups wild rice (or rice of your choosing), preferably quick cooking rice
1 3/4 cup chicken stock* See note
2 teaspoons olive or vegetable oil
Salt to taste *
In a large pan (suitable for putting into the oven), saute the onion and bell pepper in a bit of olive oil for about 1 minute. Add in the chicken, and chicken stock. Cover and put into a 400F oven for about 15 minutes.
After 15 minutes, add in the rice, and stir. Leave the lid on for about 10 minutes. After the 10 minutes, remove the cover completely, and stir. Don’t put the cover back on. Continue to bake in the oven until the rice is cooked through.
This method works well with quicker cooking rices. If you are using wild rice, or brown rice, add in the rice when you add in the chicken.
Note:
Filed under: Grains, Potatoes, Pasta, Meats - Beef, Poultry, & Fish | Tagged: casserole, chicken, chicken and rice, easy recipes, orange bell peppers, orange peppers, rice | Leave a comment »

Copper Cookie Press
I remember so vividly making spritz cookies (spritzgebäck.) at Christmas every year. I loved making the tree shaped ones, as well as the stars. We always made trees, stars, wreaths, and camels. And always used food coloring — red, green, yellow, and sprinkled them with sugar or decoration. What I especially remember was eating the trees — one little tree ‘section’ at a time, until all that was left was the very tip, where there was a shiny candy “ornament”.
I always enjoyed making spritz cookies, because of the many different shapes that were possible – mostly because I really dislike making rolled out cookies — they take way too long and you are never finished when they come out of the oven — you have to decorate every single one. Spritz cookies, on the other hand, are yummy tasty, shaped nicely, and handled minimally. A bonus for Christmas time, imo.
There are quite a lot of cookie presses on the market — everything from electric and battery operated, to hand crank, press, gun, and screw extruders. I’m most familiar with the type shown here to the left. The bottom twists off so you can change the shapes easily, and  fill quickly. It’s easy to clean, doesn’t have a ton of moving parts, and if the one I have is indication of the length of time these last, mine is just about 50 years old (my Gram gave it to me about 12 years ago). Take a look in your mother/aunt/grandmothers cabinets, and you may find one similar to this. I’ve collected about 40 different shaped disks over the years, so you may find a fun assortment.
Using a old press such as this is simple, but needs a good bit of wrist movement. Choose the shape you’d like to make, and then fill the cookie press 2/3’rds full, packing the dough. Insert the screw and tighten. Place the press on the cookie sheet, and twist one full twist around, and then slightly backwards. Lift, and then repeat until you’ve filled the cookie sheet. If the dough is too soft (warm), it will stick. Put it in the refrigerator for a few minutes (20 or so), and then start again, (careful – if the dough is too cold, it won’t extrude.) Press the cookies onto a cool cookie sheet, not one just out of the oven.
1 cup butter, softened
1 package (3 ounces) cream cheese, softened
1 cup sugar
1 egg (yolk only)
1 teaspoon vanilla
1 teaspoon lemon zest
2 1/2 cups flour
1/2 teaspoon salt
Oven should be set to 350F
Mix butter and cream cheese together well. Add sugar, and mix until fluffy. Add egg yolks, vanilla and lemon peel. Mix well and then gradually add in the flour and salt.
Using a cookie press, press the cookies onto a parchment lined cookie sheet and bake for 12-14 minutes, or until lightly browned. If you don’t use parchment, just use an ungreased cookie sheet.
Allow to cool about 5 minutes before removing from the cookie sheet, and then remove and cool completely. These will keep fine in a tightly sealed container or bag, and freeze wonderfully.
Filed under: Christmas, Desserts | Tagged: Christmas, christmas cookies, cookies, food, recipes, spritz, spritzgeback | 6 Comments »

White Chocolate Chips
December has always been the time to make all those delicious recipes you’ve saved up for the Christmas season. And this, in my house, is one of those.
I first had cherry almond fudge at my Mothers house one year when we were there for Christmas. She had purchased it from a local candy maker, and didn’t have a recipe. Once I was back home in New York, I did a search and came up with the following recipe.
I’ve never really changed it, though I do add a bit more chopped almonds. And I have had to substitute white chocolate chips for regular chocolate chips, as well as “white candy making disk” like things I found at a craft store in the candy section.
This recipe takes about 10 minutes to prep, and a minimum of 2 hours to cool, so it is relatively quick. I really like to individually wrap each piece in candy foil, which makes a great presentation.
Enjoy!
2 cups or 12 ounces white chocolate chips
1 can (14 ounces) sweetened condensed milk
1/2 cup almonds, chopped
1/2 cup candied cherries chopped
1 teaspoon almond extract
Use an 8×8 square pan — Spray with pam, and then line with parchment paper. Alternativly, you can line the pan with the non-stick foil that is on the market nowadays.
Mix the chocolate and milk together, and then microwave on high, stirring every 30 seconds until the chocolate is smooth.
Stir in the almonds, cherries, and almond extract. Pour the mix into the pan. Chill for at least 2 hours, but best after at least 6.
Lift out the fudge, or turn out onto a cutting board. Remove the paper or foil, and cut the fudge into 1 inch squares.
Filed under: Christmas, Desserts | Tagged: almond, candy, cherries, cherry, Christmas, food, fudge, recipe, white chocolate | 4 Comments »
What do you do with leftover mashed potatoes? I mean, really – who does much with them?? There are recipes out there, of course, but if you are like me, you aren’t going to a darn thing with leftover potatoes, except eat them, and then 3 weeks later, after you’ve forgotten they are in the back of the fridge, throw them out.
This recipe is a perfect and easy solution. Perfect for leftovers from Thanksgiving, or that roast you made on Saturday. It’s a quick put together for a weeknight meal, or with a breakfast of eggs on a Sunday morning.
I’m really trying to practice the frugality that I’ve learned over the years, and this recipe is great on the pocketbook. Use leftover mashed potatoes – the remainder of the ingredients are usual pantry staples, with the cheese being about the only thing you might not have on hand.
Enjoy!
2 cups mashed potatoes
1 egg, beaten
1 teaspoon salt and pepper
3 tablespoons flour
1/3 cup shredded Cheddar cheese
1 tablespoon butter
Mix together potatoes, egg, salt & pepper, flour and cheese. You can either make patties, by hand, or drop spoonfulls onto a hot pan, and then flatten with a spatula. They should be about 1/2 inch thick, and around 3 inches diameter.
Melt the butter on a non-stick pan. Cook anywhere from 5-8 minutes per side, until golden brown. I prefer about 8 minutes, as they get nicely crispy.
There are a lot of additions that can be made to these:
Filed under: Vegetables | Tagged: Cheese, food, leftovers, mashed potatoes, pancakes, potato pancake, recipes | 2 Comments »
This is one of my favorite leftover turkey recipes. It’s simple, quick and yummy. I always make sure I have acocados, spinach and cheese in the house, just for leftovers from Thanksgiving.
I first made these one year when we had “leftover” Thanksgiving guests — they stayed for the weekend. I needed something simple, because I was literally all cooked out from the day before. I didn’t have flatbread, and instead used tortillas, but these were a big hit with everyone.
The recipe is a fluid one — it can be changed easily, depending upon what you have left from the big meal. The last time I made this, I used leftover salad – lettuce, diced carrots, onions, tomatoes, black olives – in place of the spinach, tomato, onion that is in the recipe below. It was one less thing to have to prep.
The recipe for flatbread is included below — literally, and I’m not kidding – 5-7 minutes prep, 6-10 minutes cooking, and these are ready. They are quick, and so simple. And once you make them, you really will be amazed at how often you will add them into your recipes, replacing sliced bread, or tortillas.
Oh, I can’t wait for this!!!
Enjoy!
2 cups cooked turkey
2 green onions, chopped
1 Roma tomato, seeded and chopped
1 avocado, chopped
1/3 red onion, minced
1/3 vinaigrette
4-6 pieces of flatbread (recipe below), or tortillas
2 cups fresh spinach, chopped
1 cup Gorgonzola, crumbled * see note
Gently mix the turkey, onion, tomato, onion and avocado – you don’t want the avocado to become mush. Add in the vinaigrette and stir gently. To serve, put the turkey mixture into a flatbread or tortilla and top with the spinach and blue cheese. Roll and serve.
Notes:
3 cups flour
1 cup cold water
3 tablespoons shortening
1 teaspoon salt
2 teaspoons baking powder
1/4 teaspoon baking soda
Combine all the ingredients, cutting in the shortening, and mix until combined and doughy.
Now, there are a couple of ways to do this:
Or
Once you’ve gotten these rolled out and sized, prick the pieces with a fork — at least 7-8 times on each piece.
To cook, lightly oil a non-stick pan (Spray with Pam very lightly). Cook over medium-high heat, and turn once. These cook fast, so watch them carefully. Be fully prepared to ruin the first ;)
Filed under: Breads, Meats - Beef, Poultry, & Fish, Snacky Things | Tagged: avocado, bleu cheese, flatbread, food, leftover thanksgiving, recipes, spinach, turkey leftovers | Leave a comment »
Super quick and simple, this flatbread recipe will be one of those recipes you make and say WHY have I not made these before??
There are tons of uses for these – just think this:
LOL — But really, flatbread is really incredibly versatile. You’ll find all sorts of good uses for it.

3 cups flour
1 cup cold water
3 tablespoons shortening
1 teaspoon salt
2 teaspoons baking powder
1/4 teaspoon baking soda
Combine all the ingredients, cutting in the shortening, and mix until combined and doughy.
Now, there are a couple of ways to do this:
Or
Once you’ve gotten these rolled out and sized, prick the pieces with a fork — at least 7-8 times on each piece.
To cook, lightly oil a non-stick pan (Spray with Pam very lightly). Cook over medium-high heat, and turn once. These cook fast, so watch them carefully. Be fully prepared to ruin the first ;)
Filed under: Breads | Tagged: bread, flatbread, food, recipes | 3 Comments »

Have a Happy Thanksgiving, everyone :)
Filed under: Misc, Thanksgiving | Tagged: food, funny, recipes, Thanksgiving | Leave a comment »
I don’t really make many appetizers on Thanksgiving — whats the point with all the amazing food that is served? But back in the “married” days, the ex’s family would pretty much eat from sunup, to sundown.
Everything you can think of was served — all sorts of pickles – sweet, and extra sour; 10-15 different types of olives; all sorts of hard aged meats, and cheeses; breads; and all sorts of savory dips.. you name it, and it was on the table.
One thing that everyone always seemed to like was a basic cream cheese based clam dip – simple and easy to put together. You can make this up to 2 days ahead without a problem.

Doxsee Minced Clams - 6.5oz can
There are several different types of minced clams on the market, and depending upon where you live, the availability will differ. I tend to use the brand pictured on the right – Doxsee Minced Clams, from the The Doxsee Sea Clam Co., but use what you have around.
2 packages (8 ounces each) cream cheese, softened
2 cans (6-1/2 ounces each) minced clams, drained
2 tablespoons mayonnaise
1 1/2 tablespoon chili sauce
1 teaspoon minced garlic
1/2 teaspoon Worcestershire sauce
In a small bowl, mix the cream cheese until smooth. Add in all the remaining ingredients and mix well. Refrigerate for 4-6 hours before serving, though it tastes even better if allowed to refrigerate at least overnight. You can, if necessary serve this right away.
Serve with crackers, or small, thin sliced breads.
Filed under: Snacky Things | Tagged: appetizer, clam dip, clams, food, holiday, recipes | 2 Comments »
Yet another chilled recipe from me for Thanksgiving Day. Yes.. I love chilled desserts!!!
 This recipe is a slight adaptation from a recipe that’s been going around for years. The traditional recipe calls for a graham cracker crust, but I always felt that was lacking something. So, one year, I tried it with toasted pecans, and wahhlaaalaaa – it was great. If you don’t want to use the pecan crust, try a Gingersnap or Graham cracker crust instead.
Enjoy!
Pecan Pie Crust (recipe below)
1 14-ounce can sweetened condensed milk
1 egg
1 teaspoon cinnamon
1/2 teaspoon ground ginger
1/2 teaspoon ground nutmeg
1/2 teaspoon salt
1 envelope unflavored gelatin
2 teaspoons water
1 16-ounce can pumpkin
Combine the milk, egg, spices and salt. Set aside.
In a sauce pan, sprinkle the unflavored gelatin over the water and let stand for 1 minute, then begin stiring over low heat, until the gelatin is totally dissolved – about 2-3 minutes.
Keeping the heat on low, and using a whisk, blend in the milk/spice mixture into the gelatine. Stir until the mix is slightly thick, about 5 minutes. Remove from the heat, stir in the pumpkin, mixing well. Pour into the pecan crust and chill at least 6 hours, but overnight is best.
Garnish with extra pecans, if you haven’t eaten them all ;)
2 Cups toasted pecans
2 teaspoons butter, melted
1/2 teaspoon vanilla
4 tablespoons brown sugar
1 tablespoon water
Lay the pecans on a parchment lined baking sheet and roast for about 2-3 minutes in a 350 degree oven. Watch them carefully
Remove and place the pecans in a food processor and grind until fine. Add the remaining ingredients and continue to process until the mix starts forming a ball and pulling away from the sides of the bowl.
Press into a 9 inch pie pan, pressing the mix evenly across the bottom and up the sides. Bake in a 350 degree oven for 20 minutes.
Filed under: Desserts, Thanksgiving | Tagged: food, Gluten Free, no bake, no bake pumpkin pie, pecan crust, pumpkin pie, recipes, Thanksgiving | Leave a comment »
 Mmmmm
Mmmmm
Dessert on Thanksgivng!!
The traditional thing is Pumpkin Pie, and I’m all for that (there’ll be an upcoming recipe for it, too), but one thing that I think always hits the spot after Thanksgiving dinner is a nice cool dessert. The house has been heated up all day, your tummy is full of hot turkey, potatoes, yams, stuffing, and corn — and to round out dinner, a chilled dessert always seems to fit the best. Last year I made Roosamanna Semolina Pudding, and this year it will be Cranberry Cream Pie.
You can use canned whole cranberries if that is your preference, though I usually use a homemade cranberry sauce (as is linked below). Use what you like, and what you have though.
Enjoy!
Graham Cracker Crust (see below) (No need to bake, just refrigerate before filling)
1 cup whipping cream
1/4 cup sugar
1/2 teaspoon vanilla
1 8 ounce package cream cheese, softened
1 1/2 cup Orange Cranberry Sauce (Or one can of whole berry cranberry sauce)
In a mixing bowl, beat cream cheese until smooth and fluffy.
In a second bowl, combine the whipping cream, sugar and vanilla. Whip until thick, but not stiff peaks. Gradually add in the cream cheese, beat until smooth and creamy. Fold in the cranberry sauce. Reserve about 1/4 cup of the cranberry sauce for garnish. Spoon the mixture into the graham cracker crust and freeze at least 4 hours. Overnight is best.
To serve, remove from the freezer about 10 minutes before hand. Top with the remaining cranberry sauce and any left over whipped cream.
1 2/3 cups graham cracker crumbs
1/4 cup sugar
1/4 cup plus 2 Tablespoons butter, melted
Mix together graham cracker crumbs, sugar, and butter until well-combined. Press mixture into the bottom and up the sides of a 9-inch pie plate or tin. For baked pies, preheat oven to 350 F and pre-bake crust for 7 to 9 minutes. Cool before filling. For no-bake refrigerator or freezer pies, no baking is necessary.
Filed under: Desserts, Fruits, Thanksgiving | Tagged: cranberries, Cranberry, cranberry frozen pie, dessert, food, pie, recipes, Thanksgiving | Leave a comment »
Thanksgiving dinner with Turkey just isn’t quite complete without “stuffing”, or dressing. This recipe is one I kind of made up really quick when I was told I was making the dressing about an hour before Thanksgiving dinner was to start. I thought about what my mother had done, and then the flavors of dressings that I have always liked. Sausage stuffing has always been something I just loved, and it was always liked by everyone, so, I went to the refrigerator, grabbed what I had, and started in.
I have my notes from the day here beside me now – the only thing that is “exact” measurement was the sausage – everything else was an estimate. I later made this recipe again, being much more careful about measurements, and the note taking.
One thing I will say about this recipe — it goes fast, and I do mean that. Super fast. Make extra if you want leftovers. This recipe should serve 6-8 easily.

1/2 pound Italian sausage
1/4 cup butter or margarine
1/2 pound mushrooms – sliced
3/4 cup celery, chopped
1 medium onion – chopped
salt and pepper to taste
6-7 cups dry bread, cubed
1/2 teaspoon dried sage or 1 teaspoon fresh sage, minced fine
2 1/2 –3 cups chicken stock
drippings from the turkey
In a frying pan, brown the sausage, breaking it up into small pieces as it cooks. Once the sausage has cooked, remove the sausage and set aside. Drain away the grease from the frying pan, leaving a bit left in the pan. Add the butter, and melt it. Add in the onion, celery and mushrooms and cook 3-5 minutes, or until the onion is clear. Add in the sage, and then salt and pepper. Add the sausage back in, add the cubed bread, and enough of the stock to moisten the bread.
Place in a greased baking dish. 2 quart casserole dish is best, but a 9×13 cake pan will work fine, too. Cover and bake at 350F for about 30 minutes. Add in a few teaspoons of drippings from the turkey once or twice, just to give that extra depth of flavor. Uncover and bake about 10 more minutes.
Notes:
Filed under: Meats - Beef, Poultry, & Fish, Side Dish, Thanksgiving | Tagged: dressing, food, mushroom, recipes, sage, sausage, sausage stuffing, stuffing, Thanksgiving | Leave a comment »
I had all good intentions of writing a nice long post on how I cook a turkey. I really did. But there are hundreds of sites online that do the same, so I thought I’d put together a small list of sites that contain videos, to help show and teach you how to cook a turkey. The videos are all aptly named “How to cook a turkey”..lol.
Want more videos: Click here for Google Results
Have fun!! And let me know if you learned any thing that made a difference :)
Filed under: Misc, Thanksgiving | Tagged: food, How To Cook Thanksgiving Turkey, recipes, turkey, turkey videos | Leave a comment »
This blog is usually about the recipes I have to share, and the experiences I have had. However, with the economic climate, jobless rates, and the recession/depression we are in, I thought it necessary to provide this list.
Food Pantry links:
These are several of the food pantries and agencies that are serving Thanksgiving meals over the next week locally in Westchester County, New York, including contact information for anyone wishing to donate.
SUNDAY – November 23, 2008
New Rochelle: 1 p.m. Free. St. Catherine AME Zion Church, 19 Lincoln Ave. 914-633-5234.
MONDAY – November 24, 2008
Mount Vernon: 6 p.m. Free. First Reformed Church Food Pantry/Kitchen, 135 S. Sixth Ave. 914-664-3846.
TUESDAY – November 25, 2008
White Plains: 4 p.m. Free. YWCA of White Plains (Shelter & Food Pantry), 69 N. Broadway. 914-428-1130.
Yonkers: 3 p.m. Free. Food Pantry/Kitchen at Bethany AME Church, 21 Ludlow St. 914-562-6902.
WEDNESDAY – November 26, 2008
Mount Vernon: 5 p.m. Free. Community Service Associates Project Family Soup Kitchen, 115 Sharpe Blvd. S. 914-668-1428.
Port Chester: 5:30-7:30 p.m. Free. St. Frances AME Zion Church, 18 Smith St. 914-939-1056.
THURSDAY – November 27, 2008
Haverstraw: 11 a.m.-2 p.m. Free. Sponsor: Haverstraw Committee for Thanksgiving and Christmas Dinner. Quisqueya Sports Club, 25-27 Broadway. 845-947-8532.
Mount Vernon: 1 p.m. Free. Grace Baptist Church, 52 S. Sixth Ave. 914-664-2676.
New Rochelle: Noon-3 p.m. Free. The Salvation Army, 22 Church St. 914-632-0381.
New Rochelle: 1 p.m. Free. First Assembly of God, 165 Union Ave. 914-632-0031.
Peekskill: 11:30 a.m. Free. United Methodist Church, 1040 Main St. 914-737-8544
Suffern: 11 a.m.-1 p.m. Free. Food Pantry of Christ Episcopal Church, 65 Washington Avenue. 845-357-1615.
Valhalla: 1 p.m. Free. Grasslands Homeless Shelter (Volunteers of America), 25 Operation Drive. 914-231-4201.
White Plains: Noon. Free. Grace Church Community Center, 33 Church St. 914-949-3098, Ext. 100.
White Plains: 1:30 p.m. Free. The Salvation Army, 16 Sterling Ave. 914-949-2908.
Yonkers: Noon-2 p.m. Free. Sharing Community, 1 Hudson St. 914-963-2626, Ext. 222.
FRIDAY – November 28, 2008
White Plains: 11 a.m. Free. Mount Hope AME Zion Church, 65 Lake St. 914-948-6372.
Filed under: Misc | Tagged: Food Pantries, food pantry, soup kitchen | Leave a comment »
One simple and easy dish to make for Thanksgiving Day is just roasted vegetables. I say this with a bit of surprise, because, when talking to people about this recipe, it took me aback at how many people don’t know how to roast vegetables.
Roasted vegetables are almost always on my Thanksgiving table. First off, because they are so quick and simple to do. Second, because they taste great, and third, because they make a really nice presentation.
Any vegetable can be roasted — peppers, parsnips, carrots, asparagus, tomatoes – it all depends on timing them right, and consistency of the size.

Heat the oven to 400F
Choose the vegetables — Any dense vegetable can be roasted — squash, zucchini, onions, potatoes, asparagus, peppers. I always like to have interesting colors, so for Thanksgiving, I’ll choose Yellow and Red Peppers, Carrots, and Zucchini.
Once you’ve selected what you’d like, prep the vegetables — wash and cut them into pieces. The best is to cut them into uniform sizes, which works best for roasting.
Use a baking sheet, or roasting pan – as long as it is shallow. Drizzle oil over the bottom of the pan, and add in the vegetables. Mix them around to coat the vegetables. Sprinkle with kosher salt. Spread the vegetables out so they are in an even layer, and not too close together — they need room to roast, rather than steam.
Place the vegetables in the oven. Stir every 10 minutes. These should take about 30 minutes. However, the size matters here — if the pieces are small, the roasting time will be less, if the pieces are larger, the roasting time will be more. Just keep your eye on them once the time has reached 25 minutes, checking for doneness.
Serve immediately. Roasted vegetables look great on the table, especially when they are mixed colors, and always taste yummy.
Filed under: Side Dish, Vegetables | Tagged: food, recipes, roasted vegetables, simple recipe | Leave a comment »
I have always liked cream corn — from a can, or from scratch. This recipe is a mix of both. It uses canned cream corn, but makes nice addition to it.
I’ve made this the day before Thanksgiving, and kept it refrigerated, until about 1 hour before I want to put it into the oven. Allow it to come to room temp before you bake it.
2 eggs
2 tablespoons milk
2 cans of creamed corn (14.75 ounce cans)
2 tablespoons butter, chopped in pieces
1 tablespoon flour
1 tablespoon sugar
1/2 teaspoon pepper
1/2 teaspoon celery salt
1/2 teaspoon onion powder
1/4 teaspoon garlic powder
In a large mixing bowl, beat eggs with the milk. Mix in corn and butter. Blend in remaining ingredients.
Lightly spray a baking dish — I use an 8×8 dish, or a pie pan. Transfer the corn mixture to the baking dish, and bake in a 350F preheated oven for about 50 minutes, or until it is bubbly and golden brown.
Let this sit for about 10 minutes before serving.
Filed under: Side Dish, Thanksgiving, Vegetables | Tagged: corn, creamed corn, Side Dish, Thanksgiving | Leave a comment »
This recipe is a good one to use for the holidays — it can be made a day or two in advance.
A strange, but interesting variation, is to use shredded potatoes, instead of mashed, either homemade or the type you can get at your local market.
Enjoy :)
5-6 pieces of bacon to equal about 1/2 cup when cooked, and crumbled.
1 tablespoon of leftover bacon fat/grease
1/2 cup scallions, chopped
1 medium green bell pepper, diced
5-6 cups of mashed potatoes (prepared with butter & milk)(leftover or made previous day is fine)
1 cup cheddar cheese, shredded (divided)
1 teaspoon salt
1/2 teaspoon pepper
Cook the bacon — about 5-6 pieces, depending on the size, until nicely crispy. Set aside to drain, and then crumble.
Take about 1 tablespoon of the leftover bacon fat and saute scallions and green pepper until peppers are tender.
In a large mixing bowl, combine the scallion/green pepper mixture, mashed potatoes, 1/2 cup of the cheese, 1/4 cup of the bacon, salt and pepper. Pour into a lightly greased baking dish – about 2 quart size. Sprinkle the remaining cheese and the bacon over top.
Bake uncovered at 350F for 20-25 minutes, until the cheese is bubbly and golden.
- Sour cream — add 1/2 cup sour cream
- a clove of garlic added when you saute the scallions and green peppers
- instead of cheddar, use a mix of feta and Parmesan or Romano — yummy when combined with the addition of garlic, as above. Use 1/2 cup feta, and 1/2 cup Parmesan.
- mix the peppers up — use yellow, red and orange bell peppers
- use a medium yellow or white onion, instead of scallions
- use chives, instead of scallions
Filed under: Grains, Potatoes, Pasta, Thanksgiving | Tagged: food, holiday recipes, potato, recipes, twice baked potato | Leave a comment »
This drink is just a nice one to have for the kids – it always makes Thanksgiving Day more festive and fun.
What my Gram used to do was something similar — she would take what was left after making the mix for pumpkin pie, and mix it with cold milk. But because that has eggs, I just do as follows:
3 cups milk
1 cup half and half or cream
1 1/2 cup canned pumpkin puree
3 tablespoons sugar (or to taste)
1 1/2 teaspoon pumpkin pie spice (or more/less to taste)
cinnamon
Whipped Cream
Add the milk and pumpkin to a blender and blend well. Add all remaining ingredients.
Garnish with whipped cream and a sprinkle of cinnamon.
This can me made a day or two ahead of time – Just keep refrigerated.
Serves 4
Filed under: Desserts, Thanksgiving | Tagged: Autumn, food, pumpkin, pumpkin juice, recipes, Thanksgiving | Leave a comment »
I love the mix of apples & cranberries. The pair just seem to go together so well. A Thanksgiving recipe that includes them together is always the first thing I seem to try. This recipe was shared with me a few years back on Thanksgiving — after I had eaten as much as possible ;)
The original recipe called for soaking the cranberries in ‘grape juice’, but that just seemed so odd to me. I then experimented with cranberry juice and orange juice. Both work really well. See below for some variations.
2 acorn squash
6 tablespoons butter, melted, divided
1/4 cup dried cranberries
1/4 cup cranberry juice (or orange juice)
3 medium apples
1/4 cup brown sugar
1 tablespoon lemon juice
1 teaspoon cinnamon

Prep the squash by cutting it in half, and cleaning out the seeds & strings. Brush the top
with melted butter. On a baking sheet, place the squash face down, and pour 1/2 cup water onto the baking sheet – it should be just enough to cover the bottom. Bake for about 30 minutes at 350F.
Meanwhile, soak the cranberries in the cranberry juice (or orange juice). Peel, and chop the apples until they are about 1/2 inch or so. Melt the remaining butter (about 4 tablespoons) in a frying pan, and add the apples. Cook about 5 minutes. Stir in the brown sugar and lemon juice.
Once the squash has baked for about 30 minutes, flip it over. Drain the cranberries, and mix into the apples. Fill the squash with the apple-cranberry mix, and return to the oven, baking about 30 minutes more, or until the squash is tender.
Garnish with a bit of cinnamon.
Note:
Filed under: Fruits, Side Dish, Thanksgiving | Tagged: acorn, acorn squash, apples, cranberries, food, recipes, Thanksgiving | Leave a comment »
I grew up eating the canned cranberry sauce, or canned cranberry jelly that everyone else did. You know the kind.. you open both ends of the can and the wiggle the jelly out — it keeps it’s can shape, and you cut a slice to serve it – looks like this??. Sort of sweet, sort of tart, with an underlying metallic taste to it? Never one of my favorite things. And that says a lot, because cranberries are one of my all time favorite foods.
So..lets get everyone we know, including you ;) away from the canned version of cranberry sauce/jelly. This is an incredibly easy and simple recipe, and one you can easily make the day before, or the morning of Thanksgiving or Christmas, or whenever you are going to serve it.
I can’t even say or express to you how incredibly simple this recipe is — you’ll be amazed.
1/2 cup sugar
1/2 cup brown sugar
1 cup orange juice
2 teaspoons orange zest
1 (12 ounce bag) fresh cranberries
1/4 teaspoon cinnamon
1/4 cup pecans, chopped
In a medium saucepan, dissolve the sugars in the orange juice over medium heat. Stir well until the sugars are completely dissolved.
Stir in the orange zest, cinnamon and cranberries, and still over medium heat, cook until the cranberries start to split or pop – between 10-12 minutes, usually.
Remove from the heat, and allow to cool slightly. Remove about 1/2 of the mixture to a large bowl, and using a potato masher, mash the cranberries. Mix together with the un-mashed portion, and refrigerate for about 2 hours. To serve, sprinkle the pecans over top.
This recipe is so versatile – the bare minimum you need is the cranberries, sugar, and orange juice – so, you can, if you want:
Filed under: Desserts, Sauces, Dips and Misc recipes, Thanksgiving | Tagged: Cranberry, Cranberry Sauce, food, Orange, recipes | 4 Comments »

There are many great snacks to go with beer – potato chips, cheese, various nuts, smoked ribs, pork rinds, pepper sausages and many, many more.
But in my opinion, none of them comes even close to the freshly boiled fava beans – if made in the right way. They are just horrible, if not made in the right way, so do follow my instructions!
Fava or broad beans (Vicia faba, also faba bean, horse bean, field bean, tic bean) should be readily available everywhere in the world. If you cannot find fresh beans, don’t despair – dried ones are even better.
Start by soaking thoroughly rinsed fava beans in cold water – use about three times as much water as you have beans, as they will get a whole lot bigger. You can skip the soaking – but then you’ll have to boil beans for three hours or even more. Therefore, soaking is generally A Very Good Idea.
My personal invention is to add salt to the soaking water – against all expectations, beans soak faster and salt goes into them. You should soak beans at least three or four hours, but more is better. Perhaps around 8 hours is the best.
You can try if they have been soaked enough by tasting them. If they are moist and tasty, easily chewable, then they are ready. Otherwise, soak them some more.
Rinse the beans again and put them to boiling water – you will need about twice as much water as you have beans. Immediately add salt – for one thing, it increases the boiling temperature of the water a bit and secondly, it gives salt more time to go into the beans.
It is critically important to add salt right away. Some people (like my mother) will add salt when beans are almost done – and it has no time to go into the beans. And she wonders why no one wants boiled beans when she makes them. Well, they will taste like someone has already eaten them once and they didn’t sit well in his belly…
Then add smoked pork – you don’t have to add lots or pricey meat. Meat from cheap smoked ribs or ham hocks will do just fine. It is for the taste, so half of a pound is more then enough.
I add usually also some bullion cubes – either pork or some other flavor. Remember that bullion cubes are salty – you don’t want to over salt your delicious beans.
Some people also add onion, I’ve done that occasionally but am not a big fan of it. Try both with and without, perhaps you’ll like the taste. You can also add a bit of oil or butter, that will keep the beans from cracking and make the outside layer a bit softer. If you have fatty meat, though, skip the oil.
Boil on low heat from hour to hour and a half – or even two hours, depending on the size of the beans. Try to contain your hunger for them – they will start smelling delicious loooong before they are ready.
Doesn’t hurt to taste them occasionally, though… ;)
Get rid of the leftover water and pour them into a bowl or bowls. Serve immediately – it is easiest to use just fingers for eating, but a fork is OK as well. Have plenty of nice cold beer ready… and it will be a feast to remember!
However, beans are only good for an hour or so. When they get cold, they aren’t nearly as good. You can try freezing them and heating up in a microwave later, but the resulting mushy mess does not taste anything like the golden brown food of the gods you had before. So, be careful not to make too much at once.

(image from Wikipedia)
Filed under: Snacky Things | Tagged: beer snack, best snack, boiled beans, broad bean, fava bean, Vicia faba | Leave a comment »
I saw this on BoingBoing this morning, and thought everyone here might enjoy it since it is made out of pots, whisks, dinner plates and such:
From BoingBoing:
A zygomatic bone glommed together from old sauce pots; a mandible constructed from rusty whisks; a maxilla ossified from dinner plates and moustachioed with unwashed spoons. This gloriously sepulchral skull constructed entirely from old cookware and crockery was on display in London’s Regent Park a couple weeks ago as part of the Frieze Art Fair.

Filed under: Misc | Tagged: art, food, food art, pots and pans, recipes | Leave a comment »
If you are into fudge, this recipe is so freaking good. I love maple flavored fudge, with walnuts, and this recipe fits right into that, with the addition of pumpkin. Perfect for the Autumn.
I like to individually wrap these for Halloween. You can get the papers at places like AC Moore or Michaels Arts and Crafts. I usually buy these at SugarCraft.com as you can get various papers for almost anything at great prices.

2 cups sugar
1 cup firmly packed brown sugar
3/4 cup butter
2/3 cup evaporated milk
1/2 cup canned pumpkin
1 1/2 teaspoons pumpkin pie spice
1 12 ounce package white chocolate chips
1 7 ounce jar marshmallow creme
1 cup chopped nuts – pecans or walnuts
1 1/2 teaspoons maple extract
In a heavy saucepan over medium heat, mix sugar, brown sugar, butter, evaporated milk, pumpkin and pumpkin pie spices. Stir constantly, making sure sugar is dissolved. Once the mixture begins to boil, continue stirring constantly. Boil this until a candy thermometer reaches the soft ball stage between 234F and 243F degrees. I usually go for about 237, if possible.
Remove from the heat and stir in the the chocolate chips. Once the chocolate chips have melted, add in the marshmallow creme, nuts and maple. Mix well and pour into a lined or buttered pan — use a 13×9 cake pan, if you have it. Otherwise, pour it into 2 8×8 pans. Allow to cool and then cut into squares. Store in an air tight container, and refrigerate up to 10 days.
Filed under: Desserts, halloween, Thanksgiving | Tagged: Autumn, food, fudge, halloween, maple, pumpkin, recipes, Thanksgiving | Leave a comment »
Sometimes you just have things in the refrigerator that need to be used up, asap. Such was the case today. My son likes those Pillsbury Crescent rolls that come in the tube like those pictured here. For those that have never heard of them, these are raw dough, rolled out, pre-cut and then rolled back up to go into the tube. You open the tube – pop it open, unroll the dough and then shape them. Very simple to do.
I don’t mind these, though they of course don’t taste like real crossoints. But as a quick bread for a meal, they aren’t too bad.
Today, though, I opened the tube, unrolled the dough, and added some brown sugar and cinnamon, with a tiny dollop of butter, and baked them at 375F until they were golden brown. They were light little cinnamon rolls. Not too bad.
I know there are a lot of different uses for these crescent rolls — wrapping little hot dogs, wrapping brie, wrapping cream cheese and jam, etc. But I thought for those that needed an idea, and had these on hand, it might be worth this quick little post.
Filed under: Breads | Tagged: cinnamon, Croissant, pillsbury | Leave a comment »
Halloween just isn’t quite complete without popcorn. But I’m not really a fan of popcorn balls. So, I make the traditional caramel corn, and call it good. And let me tell you, it is good. Caramel corn is really easy to do, so don’t be intimidated at all. This is a very simple recipe, and prep.

2 cups brown sugar
1 cup butter
1/2 cup light corn syrup
1 teaspoon extract – vanilla, maple, almond — your choice
1/4 teaspoon cream of tarter
1/2 teaspoon baking soda
16 cups popcorn (popped!!)
salt to taste
3 cups nuts (mixed, cashews, pecans, or whatever you like)
Heat the oven to 300F.
Pop the popcorn. I usually need to do two batches. You can use microwave popcorn, but get unflavored, unbuttered and as “all natural” as you can. Newmans Own is a good choice, as well as Orville Redenbacher’s “Natural”.
Line a baking sheet with parchment, and then pour the popcorn evenly over the sheet. Sprinkle the nuts over the popcorn and set the baking sheet aside.
In a saucepan, mix the brown sugar, butter and corn syrup. You can use light or dark corn syrup, but I prefer the light. Heat to boiling, and then boil for 5 minutes. Stir constantly.
Remove the pan from the heat and add in the cream of tarter and baking soda, stiring constantly. This is going to foam up, just keep mixing it. Stir in the flavoring.
Pour the mixture over the popcorn and mix well, coating each piece. This gets messy! If you have one of those gigantic mixing bowls that people like my Mother always seem to have, you can mix the popcorn in that, and then transfer it to the baking sheet.
Place the baking sheet in the oven and bake for 20-30 minutes, stirring every 10 minutes.
Remove from the oven and allow this to cool, and then break apart. Once it is totally cool, store in a tightly sealed container or a ziplock bag.
Filed under: Desserts, halloween | Tagged: butter toffee, halloween, popcorn | Leave a comment »
Two recipes for this post, as they are sort of related. First is the Old Fashioned Hot Buttered Rum — ice cream, apple cider, rum.. mmmmmm. Takes at least overnight for this recipe to come to fruition, but it is fantastic, in the end.
The second Hot Buttered Cider — quick and nice to serve anytime in the Autumn/Winter months.

This is a fantastic way to end an afternoon of decorating the yard for Halloween or Christmas. It just hits the spot perfectly. The original recipe does not contain apple cider (water instead), but it really adds a wonderful layer to the drink.
4 cups vanilla ice cream, softened
1 cup brown sugar
1 cup sugar
1 cup butter
1 teaspoon ground cinnamon
1 teaspoon ground allspice
1 teaspoon ground nutmeg
4 cups Apple Cider
4 ounces Rum ** See note below
nutmeg for garnish
In a medium saucepan, combine the butter, brown sugar, sugar, cinnamon, allspice, and nutmeg. Cook over low heat, stirring, until the butter has melted. Remove from the heat, and allow to cool for about 10 minutes, without letting the butter set back up.
Combine the mixture with the softened ice cream in a large mixing bowl. Use a hand mixer to mix, if you have one. Otherwise stir and stir and stir until it’s smooth. Freeze until totally frozen again.
To serve this heat the apple cider in a sauce pan. Meanwhile, using 4 mugs or cups, add a scoop or two of the ice cream mixture to each mug. Pour one ounce of rum over the ice cream, and then top with the hot apple cider. Garnish with freshly ground nutmeg.
***To make this without the rum, use 1-2 teaspoons of rum flavoring added to the simmer, and do not add the rum when serving.
1 orange, sliced and seeded, with skin still on
6 cups apple cider (apple juice)
4 cinnamon sticks
4 teaspoons butter
Place 1/2 of the orange slices, apple cider and cinnamon into a medium sauce pan and bring to a boil. As soon as it has come to a boil, reduce the heat to low. Simmer for about 5-8 minutes. Remove cider from the heat, and discard the oranges. Remove the cinnamon sticks, reserving for serving.
To serve, place 1 teaspoon of butter into a mug, garnish with the remaining orange slices, and a cinnamon stick.
Filed under: Drinks | Tagged: Autumn, Christmas, cider, halloween, hot buttered rum | Leave a comment »
This is really a basic “meringue cookie” recipe, but for Halloween. The peppermint flavor was always a favorite with the kids around, and for me, especially, as peppermint cookies were always a little different. With the addition of the mini chocolate chips, the bones take on a decidedly “diseased” look.
Enjoy!

This is the shape the "bones" should be
(aka Chocolate Mint Meringues)
3 large eggs, whites only
1/4 teaspoon cream of tarter
1/8 teaspoon salt
2/3 cup sugar
3/4 teaspoon peppermint flavoring
1 tablespoon unsweetened cocoa powder
1/3 cup mini chocolate chips
Heat the oven to 200F and line two baking sheets with parchment or baking paper.
Beat the egg whites with cream of tarter and salt until quite fluffy. Slowly add in the sugar, and the peppermint.
Place the mixture in a pastry bag, if you have one. If you don’t have a pastry bag, place the mixture into a large (gallon sized) ziplock bag, and cut off the very tip. Go small with the cut, and make it larger if needed. Even a small cut can end up really large once you start piping.
Next, pipe out “bone shapes” onto the parchment paper. Don’t make these too small — 2-3 inches. The shapes can be whatever you think a bone would look like, but I usually do them in a shape of the capital letter ” I “, as above, or like a small moon. Leg bones and ribs, you know ;)
Put both baking sheets in the oven, and then bake for one hour. Then turn off the oven and allow the cookies to set for another hour. This should make about 5 dozen or so.
Notes:
Filed under: Desserts, halloween | Tagged: bone cookies, chocolate, cookies, halloween | 1 Comment »
This is a great punch — it works well for kids parties, as well as other occasions. We’ve used this at New Years, and Halloween and the kids all loved it. It looks really festive, and suits the Halloween  holiday.
For Halloween, we served this in a Witches cauldron, which was sitting in a large platter that had dry ice. Serve with gelatin Pixies, for some more fun, if you can find them.
Enjoy!
1 6oz package Orange Jello
3/4 cup sugar
2 cups boiling water
30 ounce can Pineapple Juice
46 ounce can Apricot Juice
16 ounces orange juice
1/2 cup lemon juice
4 liters Ginger Ale, or Sprite/7-Up
In a large container, dissolve the Jello and sugar in the boiling water, and stir well, until everything is dissolved. Stir in the juices and mix well. Put in the freezer – I use two of the gallon ziplock bags.
About 2 hours before serving, remove the mixture from the freezer to soften, but not melt totally. Smash it around in the bags, and then place the contents of one bag in a punch bowl or a similarly large bowl. If it is not smashed up enough and soft, use a potato masher. Pour in 1-2 litres of the soda and stir to mix.
Filed under: Drinks, halloween | Tagged: halloween, jello, punch | Leave a comment »


The BEST thing about carving pumpkins for Halloween, or making fresh pumpkin pie at Thanksgiving, is the pumpkin seeds. I have always loved these, and can’t wait to roast them.
I have two different ways I roast pumpkin seeds. The first is a brine method, which needs at least 24 hours, and the second is a quick version — less than an hour from carving pumpkins to eating roasted seeds.
The reason I prefer the brine method is simple — the seeds last longer and taste amazing.
A brine is just a mix of water and and a lot of salt. You can use brines for everything from meats to vegetables. Traditionally, a brine was used as a preservative, as it inhibits the growth of bacteria. But a brine can also enhance flavors, and help meats stay juicy and tender. I’ll be using a brine again soon, when I prepare my Thanksgiving turkey, so I will talk more about brining then.
For this application, though, my intentions are to have a crunchy pumpkin seed, that is full flavored, with the salty goodness only a brine can bring to my pumpkin seed party. ;)
If you have time, do try the brine method. If not, the second option works well, too.
Enjoy!
First things first — prep the seeds:
Rinse the pumpkin seeds under cold water, removing the pulp and pulpy strings.
Option 1 – The long method. Using a heavy brine to salt the seeds
Create a brine, using 1 cup salt to 3 cups water (or more as needed with a ratio of 1 cup salt to 3 cups water) See note below) and add the pumpkin seeds. Mix well, and then allow this to sit overnight.
The next day, heat the oven to 325F. Drain the pumpkin seeds.
Place the pumpkin seeds in a single layer on a greased baking sheet (or a parchment lined baking sheet). Bake for 30-45 minutes. Stir every 10 minutes.
*Note: This may take a bit longer than 35 minutes, depending on the size of the seeds. Add time as needed, until the seeds are done, up to about 20 minutes.
Option 2 – The quick method
Heat your oven to 325F.
Place the pumpkin seeds on a heavily oiled baking sheet. Stir to coat the seeds. Salt the seeds liberally, and then bake for around 25-30 minutes. Stir every 10 minutes. *See note
Remove the seeds from the oven and allow to cool. Store in an air tight container.
- 1 cup salt to 3 cups water
- 2 cups salt to 6 cups water
- 3 cups salt to 9 cups water
Filed under: Thanksgiving | Tagged: halloween, pumpkin, pumpkin seeds, Thanksgiving | Leave a comment »
I was wandering through my RSS feeds this morning, and when reading “so you wannabee a Domestik Goddess?”(one of my fav fun blogs to read), I came across this “food tasting meme” I thought looked fun. It’s a list of 100 foods – would you or wouldn’t you eat it.
I thought my tastes were pretty broad, but once I started checking these off, I realized I need to broaden my horizons a bit.
If you’d like show this (with your own results), and add it your own blog, the instructions are below the results.
Oh, and I’ll take the Pocky, (Strawberry, if you please) over tartare anyday. ;)
To make the filling out of this form and generating the HTML for it a bit easier, reddywhp has played around with some PHP. Go to http://reddywhip.org/lj/foods/ and fill it out there. After filling it out, you will be given the code to copy and paste into your blog.
Filed under: Misc | Tagged: food, foods you won't eat, fun, pocky, recipes | 2 Comments »

Like I’ve said in a previous post, I didn’t really like oatmeal much as a child. It wasn’t until last year that I gave it another chance. That said, I’ve been experimenting ;)
It’s pumpkin season, and one of my very favorite things to eat at this time of year is anything with it! So on these cool Autumn mornings, it seemed pretty logical to try to use some pumpkin with my oatmeal. It tastes almost like creamy pumpkin pie, and, next time I make it, if my son isn’t around, it might just get a big dollop of whipped cream ;)
Enjoy!
1/2 cup milk
3/4 tablespoons water
1/2 cup old-fashioned oats
1/2 teaspoon of cinnamon
1/2 teaspoon of nutmeg
1/2 teaspoon teaspoon maple extract
1/4 cup canned pumpkin
brown sugar, to taste
Bring the milk and water to boil over a medium heat. Add in the oats, cinnamon, and nutmeg. Reduce the heat to medium low and simmer until most of the liquid has been absorbed, stirring often. Add in the pumpkin and maple extract, and then serve. Sprinkle with brown sugar, to taste.
You can change out the maple for vanilla, or leave it out all together.
Filed under: Grains, Potatoes, Pasta | Tagged: Autumn, cereal, maple, oatmeal, pumpkin | 2 Comments »
I was trying to quickly scale a recipe, and found this old chart hidden among my recipe files. I thought it might come in handy for those that are looking to do the same.
| Original Recipe Measure | Half Scaled Measure | Double Scaled Measure |
|---|---|---|
| 1/8 tsp. | Dash or Pinch | 1/4 tsp. |
| 1/4 tsp. | 1/8 tsp. | 1/2 tsp. |
| 1/2 tsp. | 1/4 tsp. | 1 tsp. |
| 1 tsp. | 1/2 tsp. | 2 tsp. |
| 1 1/4 tsp. | 5/8 tsp. | 2 1/2 tsp. |
| 1 1/2 tsp. | 3/4 tsp. | 3 tsp. (1 tbsp.) |
| 1 3/4 tsp. | 7/8 tsp. | 3 1/2 tsp. |
| 2 tsp. | 1 tsp. | 4 tsp. |
| 2 1/2 tsp. | 1 1/4 tsp. | 5 tsp. |
| 1 tbsp. | 1 1/2 tsp (1/2 tbsp.) | 2 tbsp. |
| 1 1/2 tbsp. | 1 1/4 tsp. | 3 tbsp. |
| 2 tbsp. (1/8 cup) | 1 tbsp. | 1/4 cup |
| 3 tbsp. | 1 1/2 tbsp. (4 1/2 tsp.) | 6 tbsp. |
| 4 tbsp. (1/4 cup, or 2 fl. oz.) | 2 tbsp. | 1/2 cup |
| 1/3 cup | 2 tbsp. + 2 tsp. | 2/3 cup |
| 1/2 cup (4 fl. oz.) | 1/4 cup | 1 cup |
| 2/3 cup | 1/3 cup | 1 1/3 cups |
| 3/4 cup | 3 tbsp. | 1 1/2 cups |
| 1 cup (1/2 pint) | 1/2 cup | 2 cups |
| 1 1/4 cups | 1/2 cup + 2 tbsp. | 2 1/2 cups |
| 1 1/3 cups | 10 tbsp. + 2 tsp. | 2 2/3 cups |
| 1 1/2 cups | 3/4 cup | 3 cups |
| 1 2/3 cups | 1/2 cup + 1/3 cup | 3 1/3 cups |
| 1 3/4 cups | 3/4 cup + 2 tbsp. | 3 1/2 cups |
| 2 cups (1 pint) | 1 cup | 4 cups (1 quart) |
| 2 1/2 cups | 1 1/4 cups | 5 cups |
| 3 cups (1 1/2 pints) | 1 1/2 cups | 6 cups (1 1/2 quarts) |
| 3 1/2 cups | 1 3/4 cups | 7 cups |
| 4 cups (2 pints, or 1 quart) | 2 cups (1 pint) | 8 cups (1/2 gal.) |
| 4 1/2 cups | 2 1/4 cups | 9 cups |
| 5 cups (1 1/4 quarts) | 2 1/2 cups | 10 cups (2 1/2 quarts) |
| 5 1/2 cups | 2 3/4 cups | 11 cups |
| 6 cups (1 1/2 quarts) | 3 cups (1 1/2 pints) | 12 cups (3 quarts) |
| 7 cups (1 3/4 quarts) | 3 1/2 cups | 14 cups |
| 8 cups (2 quarts, or 1/2 gal.) | 4 cups (1 quart) | 1 gal. |
| 10 cups (2 1/2 quarts) | 5 cups | 5 quarts |
| 3 quarts (3/4 gal.) | 6 cups (1 1/2 quarts) | 1 1/2 gal. |
| 14 cups (3 1/2 quarts) | 7 cups | 7 quarts |
| 1 gal. | 1/2 gal. | 2 gal. |
| 2 gal. | 1 gal. | 4 gal. |
Filed under: Misc | Tagged: double a recipe, half a recipe, scale | 6 Comments »

|
Filed under: Misc | Tagged: food, ph values, recipes | Leave a comment »
 The US is a nation of coffee drinkers, as is proved by the copious number of coffee shops from coast to coast. You can get a good selection of coffee almost anywhere these days, from the local Exxon or Hess gas stations, to the bodegas, delis, Mom & Pops, and of course the ever present Starbucks.
However, when it comes to teas, the choices are severely limited. Starbucks offers some Tazo tea, which is okay and surely better than nothing. But usually, you are stuck with bagged tea — Lipton, Tetley, or some sort of flavored bagged tea. Off-the-shelf bagged tea that you find at your local “mega mart” is just flavorless bags of fannings. Yes, it’s true — I’m a tea snob :P
I recall having dinner one evening in the city at a very nice restaurant. I should have known better than to order tea when I was handed the dessert menu which had a full page listing of the varieties and styles of coffees, and just “Tea” listed. I ordered it anyway, think that this restaurant, being a 4 star rated place, would serve a good, or at least, a decent cup of tea.
I was presented with a small aluminum pot, filled with luke-warm water, and a tea bag on the side. Suffice it to say that I ended up asking for a cup of coffee instead. You just cannot brew tea leaves, even tiny fannings, in tepid water.
Starbucks has about 11,500 shops worldwide. And there are *tens of thousands* of places in the US to get good coffee. However, a rather complete listing of tea shops is around 2208 tearooms *worldwide*.
I started drinking tea when I was a girl — Constant Comment which is a blend of black tea, orange rind and spices. Sleepytime was another. In my late teens, I started drinking Lipton almost daily, preferring it over coffee. I do admit to still using both the Constant Comment and the Sleepytime — scents and flavors of your childhood stay with you forever, it seems.
And then one afternoon I was introduced to Darjeeling. A perfectly brewed cup of first flush Darjeeling. It was delicate, and tasted to me like a perfect bottle of Red wine might taste to a wine connoisseur – it was amazing. I fell in love with the flavor of the tea, but also the whole preparation of it.
That cup of Darjeeling changed how I viewed tea forever. I started learning about the different varieties of tea – everything from an oolong and Lapsang Souchong to Assam and Ceylon and everything in between.
Trial and error taught me how to make a good cup of tea, but it wasn’t immediate. I over brewed, under brewed, used too much leaf, or not enough. I read everything relating to tea that I could get my hands on, and experimented with different styles of pots, different brewing techniques, different water temperature, different filters, infusers, strainers…you name it, I wanted to know about it.
Eventually I found what worked best for me, and the types of teas that I loved, some that I liked a lot, some that are amazing in winter, but not so great in summer, and vise-versa, and some teas that I just could never get a taste for. I’ll go into this in detail in the next tea post.
This is the equipment I use:
hot water kettle
4 cup teapot
teasock infuser/filter
Long handled measuring spoon
I started out my tea adventure very simply, and very cheaply. I found an online tea shop and picked out a couple of different tea samples. And I purchased the least expensive tea pot I could find, which came with a built-in stainless steel mesh strainer, and boiled water in a pot on the stove. The teapot leaked, and dripped tea every time you poured it, but it was fantastic to me. This was what tea was all about
As I progressed, so did the tools I used. I used to have a lot of different tea pots, but what I stuck with is

Chatsford Tea Pots
just the basic — a 4 cup pot. The favorite pot – one that does not drip, and holds its heat very well is the Chatsford Earthenware 4 Cup teapot, Series “B”. The latest version is the series “E”. It comes in various sizes, from 2 cup (12 ounces) to 10 cup (60 ounces). Chatsford pots were designed to fit the strainer that is included with every pot, so the strainer sits perfectly inside. The Chatsford comes in earthenware, as well as bone china and porcelain.
Some people prefer to steep the tea directly in the water, and then strain into another pot. For me, that isn’t necessary. I have tried a lot of different strainers and filters – bamboo, stainless steel mesh, plastic mesh, fine cheesecloth. All will work, depending on the size of the tea leaf. It’s just a personal preference.

Tea Sock
I use what is called a tea sock. It is basically a 2-4 inch hoop-ring that holds a double ply “sock” made of muslin cotton. It isn’t pretty, and perhaps not something that you want to use when you have guests, as it quickly stains, but it is large enough that the sock itself expands, allowing the tea to brew fully within it, easy to clean, and store.
I used a stove top tea kettle for many years, prefering the ceramic kettle made by Joyce Chen. But that was lost in the divorce ;). I used just a pot on the stove until I found the electric kettle I wanted. My favorite addition to my ‘tea tools’ is an electric kettle, with variable heat settings. The one I use is the UtiliTEA Kettle, sold by Adagio Teas. It’s the perfect size for the 4 cup pot. The variable heat settings are great, as you can get water to boiling for black teas, yet there is a setting low enough to brew green teas.
I originally was going to make this one post, but once I started writing about tea, I realized that this has to be split into a few different posts.
I’m passionate about tea. There is genteelness to tea and an art to it’s preparation. There isn’t anything like the ritual of making a morning pot of tea — waiting for the water to boil, pouring that boiling water over the tea leaves, smelling the wonderful aroma that drifts upwards and fills the air with a sweetness that is indescribable, the seemingly endless wait for the leaves to steep and the heavenly taste that is the first sip.
I hope you enjoy this post, and the ones to follow in this tea series as much as I know I will enjoy writing them.
Filed under: Drinks | Tagged: chatsford, tea, tea preparation, teasock | 2 Comments »
Soups are the ultimate comfort food, perfect in the Autumn, Winter and Spring, and even on a Summer day. This soup is one of those year-round soups. Even if it is too hot to use the oven to roast the tomatoes, you can always roast them on your gas or charcoal grill.
I like tomato soup (as long as it isn’t one of those canned versions), and one of my favorite cheeses is blue cheese, so this soup hits a positive on all counts.
I usually make this on a cool Saturday afternoon, and serve for dinner. Any leftovers are always a Sunday lunch, served with grilled cheese sandwiches. Yumm!!
3 pounds of roma tomatoes, peeled,  and seeded
2 cloves garlic, minced
2 tablespoons vegetable oil
1 leek, chopped
1 carrot, chopped
1 1/2 quarts chicken stock
4 ounces blue cheese, crumbled
3 tablespoons heavy cream
fresh basil leaves
salt and pepper to taste
Heat the oven to 400F. Spread out the tomatoes in a lightly oiled baking dish — 13×9 cake pan will work quite well. Sprinkle with garlic, salt and pepper and roast for 35 minutes.
Meanwhile, heat the oil, and saute the leek and carrot for about 3 minutes, then turn the heat to low and simmer for 10 minutes, until soft.
Stir in the chicken stock, and tomatoes. Bring to a boil, then lower the heat to medium-low, and simmer for 20 minutes.
Remove from heat and add the blue cheese, cream and basil. Using a stick blender, puree the soup until smooth.
Filed under: Cheese, Soups, Vegetables | Tagged: blue cheese, soup, tomato, tomatoes | 1 Comment »
I was raised on Mrs. Pauls Fish Sticks, white salted cod, canned tuna, canned salmon (with those nasty little bones), and the occasional bit of fried shrimp. It was meat and potatoes..we had beef, chicken and pork — fish wasn’t really on the menu. So fish, and seafood were more foreign to me than anything when I first started really cooking.
I clearly remember the first time I had “fish” when I moved to New York. It was grilled Mako Shark, with a butter filled with herbs drizzled over it. It was fantastic. I ate every morsel, and, if I had not been in a restaurant, I might have licked the plate ;) At different restaurants, over the years, I tried salmon, haddock, fresh tuna, halibut, fresh shrimp, and on and on.
But I was almost afraid to try and cook fish myself. It was one thing to eat it out at a restaurant, where it was prepared properly, and tasted like it was supposed to, it was another thing to do it myself — I didn’t really know where to start. I first fried it, thinking I couldn’t mess that up too much — and I bought a piece of some fish the fish monger at my local market recommended to me. But this piece of fish was in the class I call “mushy” fish. Mushy fish is fish that is too soft for me — it’s like really wet bread, with a fish flavor to it, and, makes me gag.
I stuck with the basic “meaty” fish for a long time — salmon, shark, tuna, halibut, etc. But I started to experiment with different fish, and different seafood a few years back, and have enjoyed it immensely.
I discovered what kinds of fish I really do like — and they all, for the most part, tend to be “meaty”, as I mentioned above. But some, like the local version of tilapia that I get, is delicately flavored, yet still has a firm texture to it, which I can handle quite well. Once I felt that I could actually cook fish, I started to try different recipes and different types of fish and seafood. It’s been a fun adventure, and one I look forward to learning more about as time goes on.
The following recipe for baked tilapia was given to me by Mark, a friend of mine who thinks fish should be served 5x a week.. minimum. This is one of his favorite ways to eat it. The tilapia can be substituted with your favorite type of fish.
The relish recipe isn’t really a relish, but more like one of my favorite meals ;) It’s really great served on the tilapia, though, and so is included here as well.
Enjoy!
6 tilapia fillets
2 tablespoons vegetable oil
1/2 teaspoon garlic powder
1/2 teaspoon pepper
1/2 teaspoon basil
1/2 teaspoon salt
Heat the oven to 375F.
Rinse and pat dry the tilapia.
Mix the oil with the garlic powder, pepper, basil and salt, and brush both sides of the fish. Place on a lightly oiled baking sheet (or use a baking sheet lined with parchment paper).
Bake for 6-8 minutes, until the fish is flaky and done.
3 tomatoes, seeded and diced
2 avocados, peeled, seeded, and diced
1 1/2 tablespoon oil, preferably olive oil
salt and pepper to taste.
Prep the tomatoes and avocados. Place the tomato and avocado into a medium bowl, adding the oil, and salt and pepper to taste. Mix together well.
Serve the relish over the fish.
Filed under: Meats - Beef, Poultry, & Fish | Tagged: avocado, fish, tilapia | Leave a comment »
Yes.. Yes.. You guessed it — Another apple recipe. But I simply cannot resist. It’s apple season, already!!! Live with it!!!!
This recipe is one I got from a bed and breakfast — Sunshines Bed and Breakfast — in upstate New York, about 10 years ago. The b&b was lovely — a huge house, with 3 smaller cabins, on about 40 acres. It had this lovely lake, with the most beautiful swans — I wanted to stay forever. The woman who ran the b&b served breakfast one morning by the lake, and this is what we had — They were tender, delicious and just freaking amazing. Best of all, she had no problem sharing the recipe, as it is one she received from a fellow b&b owner. I have no idea where the recipe originated, but I do know that it is simply fantastic.
She served the pancakes with maple syrup, but to me that just never seemed quite right. The maple syrup overshadowed the apples. So, I started playing around with different syrups, and finally came up with the one that is here. I really enjoy apples, and being able to use them in as many was as possible. The syrup was just one more way for me to utilize the bushels of apples I always have in the Autumn. You can use it on regular pancakes as well. Or, use it on ice cream.. or bread pudding.. or apple bread…or spread on toast.. it’s almost endless what you can use it for.
4 eggs
1/2 cup flour
1 Tablespoon sugar
1/2 teaspoon baking powder
1/16 teaspoon salt
1 cup milk
4 Tablespoons melted butter, divided
1 teaspoon vanilla
1/8 teaspoon nutmeg
2/3 cup sugar
1/2 teaspoon cinnamon
1/8 teaspoon nutmeg
2 medium apples *See Note
Combine the eggs, flour, 1 tablespoon of sugar, baking powder, salt and the milk in a bowl, and mix until smooth. Add in 2 tablespoons of melted butter, vanilla and the nutmeg. Allow to sit overnight in the refrigerator. (Or, if you are like me, let it sit on the counter for about 45 minutes before using).
The next morning, (or 45 minutes later), heat the oven to 425F. Melt the remaining butter in a large (10-12 inch) ovenproof skillet. Spread the butter all over the pan, including the sides, and then remove from the heat.
Next, mix the sugar, cinnamon, 1/8 teaspoon nutmeg. Sprinkle about 1/2 of this mixture over the butter in the skillet.
Peel, core and thinly slice the apples, and layer the slices over the butter/sugar in the skillet. Overlap if necessary, but try to keep the layers pretty thin.
Return the skillet to the stove, and over medium-high heat, cook just until you start to see small bubbles. Pour the patter slowly over the apples. If you pour it too fast, the apples will become unseated and move around. You want the apples to be as evenly spread out as possible for more tasty goodness.
Move the skillet to the oven and bake for 15 minutes, reducing the heat after 15 minutes to 375, and then bake for another 10 minutes.
Serve with Warm Apple Cider Syrup (recipe here), or just sprinkle with confectioners (10x or icing sugar), and serve immediately.
You can use 1 large apple in place of 2 medium apples. I just like the 2 medium apples, because then I use 2 different types of apples.
Filed under: Breads, Fruits | Tagged: apples, cider, pancakes | 1 Comment »
To go with.. well, anything you can think of, really, but this recipe was posted to go along with the Baked Cinnamon Apple Pancakes.
3/4 cup, plus 2 teaspoons of apple cider
1/2 cup honey
2 medium apples, peeled, cored and chopped
1 teaspoons cornstarch.
In a saucepan over medium heat, combine 3/4 cup of apple cider, honey and the apples, and bring to a boil, stirring occasionally.
Reduce the heat to low, place a cover on the sauce pan, and simmer for about 10 minutes, or until the apples are nicely fork-tender.
In a bowl, mix the cornstarch and the 2 teaspoons of apple cider in a small bowl. Remove the apple mixture from the heat, and add in the cornstarch, stirring all the while. Return the saucepan to the heat, and cook until the mix is slightly thickened.
Notes:
Of course, the simplest apple syrup you can make goes like this
4 cups of juice or cider
Place juice or cider in a sauce pan, and simmer until it reduces to 1/2 cup.
The end.
Simple, easy, and though not as thick as you might like, amazingly tasty.
Filed under: Fruits, Sauces, Dips and Misc recipes | Tagged: apples, cider, syrup | Leave a comment »
Woot!! More apple goodness!! As I said in the last post, it’s Autumn, and apples are everywhere, especially here in New York. Any market, be it a super-market, a small local market, or the farmers markets are full of dozens of different kinds of apples, everything from Gala to Jonathan and Golden Delicious ..and everything inbetween.
With the abundance of apples, I went through all my recipes, and though I will post some of my own as the season progresses, I found this recipe — The Official New York State Apple Muffin — in the files. The subheading states: “The apple muffin was adopted as the State muffin in 1987 as a result of the efforts of elementary students throughout New York State.” I actually recall making this recipe with my son when he was in 3rd grade, at the school with his classmates. It’s a good recipe, and as muffin recipes go, simple to do.
I am making these tomorrow, again with my son — he’s in 9th grade now — and I know we’ll have fun making them, and even more fun eating them. Knowing him, these won’t last too long, either ;)

For the Topping:
1/2 cup walnuts
1/2 cup brown sugar
1/4 cup flour
1 teaspoon cinnamon
1 teaspoon lemon peel, grated
2 tablespoons melted butter.
For the Muffins:
1 cups New York State Empire Apples, peeled, cored and chopped
2 cups flour
3/4 cup brown sugar
1/2 cup sugar
2 teaspoons baking soda
1/2 teaspoon salt
1 1/2 teaspoon cinnamon
1/2 teaspoon ground cloves
1/8 teaspoon ground nutmeg
1/2 cup raisins
1/2 cup walnuts
3 eggs, beaten
1/2 cup butter, melted
4 ounces cream cheese, softened and cut into small pieces
1/2 teaspoon vanilla
Topping:
Combine the ingredints for the topping and set aside.
Muffins:
Combine apples, raisins, walnuts, eggs, butter, cream cheese, and vanilla.
Add in the dry ingredients a little at a time to the apple mixture. Stir until just combined. Do not over mix.
Portion the batter into lightly greased and floured muffin tins, (or use muffin papers). Sprinkle the muffins with the topping, and bake at 375F for 20-25 minutes.
This recipe makes about 2 dozen muffins.
Filed under: Breads, Fruits | Tagged: apples, muffin, New York | Leave a comment »
Autumn is here and it’s time for apples, and apple cider. This is one of my very favorite times of the year, and this recipe gets served in my house from about now, until Christmas. Cool Autumn weekends, Halloween, Thanksgiving, Christmas – they just are not complete without mulled cider.
Below is the version of mulled cider that I have used a lot over the years. The nice thing about this recipe is that you can leave out ingredients you might not have on hand, and it still comes out pretty well. The only thing that is really necessary is the cider, cloves and cinnamon. And even then, if you don’t have cloves, you can leave that out, too.
I like to serve this just as is – in good sized mug – one that isn’t too big, or too small. Once it is strained to remove the spices, you can put it into a thermos and take it with you on Halloween, or while cutting down your Christmas tree.
This can be made, and then re-heated easily. Just pour into a pitcher, or a serving container of some sort and refrigerate. Either warm in a pot on the stove, or a mug in the microwave.

1 gallon Apple Cider
12 Whole Cloves
2-3 cinnamon sticks
2 whole nutmeg
2 chunks crystallized ginger
1/2 lemon, sliced
1 tablespoon honey
Add Cider, clove and cinnamon, nutmeg, and ginger to a large pot. Slice lemon into wedges, remove the seeds, and add them to pot. Add honey.
Stir to combine and begin simmering, stirring occasionally. You can simmer this for 10 minutes to 2 hours. The longer (up to 2 hours) you simmer this, the better the flavors meld. Strain the cider before serving.
Alternatively, put cloves, cinnamon, nutmeg, ginger and lemon in a tied cheesecloth bag and no straining is necessary. Stir often so the flavors mix with the cider.
For the adults, add a splash of rum or bourbon when serving.
Filed under: Alcohol, Drinks, Fruits | Tagged: apple cider, Autumn, mulled | 1 Comment »
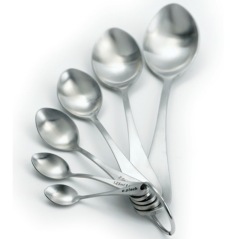
